Imagine transforming your home into a cozy sanctuary while saving a bundle on energy bills. DIY home window tinting isn’t just a crafty weekend project; it’s a game-changer. With a few simple tools and a roll of window film, you can block harmful UV rays, reduce glare, and keep your space cooler than a polar bear in sunglasses.
What Is DIY Home Window Tinting?
DIY home window tinting involves applying a film to interior or exterior glass surfaces to reduce heat and glare. This process transforms windows, providing both aesthetic appeal and functionality. Many homeowners choose this method to enjoy enhanced energy efficiency without hiring professionals.
Tint films come in various shades and technologies, allowing customization based on personal preferences and local regulations. Some films block up to 99% of harmful UV rays, protecting furniture and flooring from fading while keeping indoor environments cooler. Cost savings play a vital role; tinting can lower energy expenses by reducing reliance on air conditioning.
Installation requires minimal tools, such as a utility knife, a spray bottle filled with soapy water, and a squeegee. He or she can prepare the window surface by cleaning it thoroughly, ensuring proper adhesion. Selecting the right film type is crucial, as options range from reflective to non-reflective and various visible light transmission percentages.
Reading instructions for the chosen film provides essential application techniques. Trimming film pieces to fit window dimensions can be done accurately with a utility knife. Squeegeeing out air bubbles ensures a smooth finish, enhancing durability and appearance. Given these advantages, DIY home window tinting represents a practical solution to elevate living spaces.
Benefits of DIY Home Window Tinting

DIY home window tinting offers several advantages that enhance comfort and efficiency in living spaces. Homeowners can experience significant benefits, including cost savings, UV protection, and enhanced privacy.
Cost Savings
Savings on energy bills become evident with DIY home window tinting. By blocking heat from the sun, window films reduce reliance on air conditioning during warmer months. Estimates show that window films can lower heat gain by up to 50%. Installing window film creates a more consistent indoor temperature, which boosts comfort and helps lower utility expenses. The initial investment pays off quickly, making it an attractive solution for budget-conscious homeowners.
UV Protection
Protecting interiors from harmful UV rays stands as another key benefit. Up to 99% of UV rays can be blocked with high-quality window films, safeguarding furniture, flooring, and artwork from fading. This form of protection promotes longevity for home furnishings, ensuring they maintain their appearance over time. Homeowners who prioritize their indoor environment gain peace of mind knowing their families are shielded from these harmful rays.
Enhanced Privacy
Enhanced privacy becomes an important aspect of home comfort with window tinting. Tinted windows obscure the view from outside without sacrificing natural light. As a result, family members can enjoy their living spaces without feeling exposed. Various film options exist to suit individual tastes and privacy needs, from reflective films to darker shades. This added layer of discretion contributes to a sense of security while allowing homeowners to maintain their preferred ambiance.
Tools and Materials Needed
DIY home window tinting requires specific tools and materials to ensure a successful installation. Knowing what’s necessary can make the process smoother and more efficient.
Essential Tools
Measuring tape ensures accurate dimensions for cutting film. A utility knife assists in precise trimming of the tint. Squeegees eliminate bubbles and smooth out the film for a professional finish. Spray bottles filled with soapy water facilitate easy application. Soft cloths help with cleaning surfaces prior to installation, ensuring proper adhesion. These tools together enhance the overall efficiency of the tinting process.
Tinting Films
Various window tinting films are available, each offering unique benefits. Solar control films effectively block up to 99% of UV rays, protecting furniture and flooring from fading. Privacy films obscure outside views while allowing natural light, enhancing security. Decorative films can also enhance aesthetics by adding style and texture to windows. Films come in different shades, allowing homeowners to choose based on their visibility and privacy preferences. Selecting the right film is crucial for achieving desired results in both functionality and appearance.
Step-by-Step Guide to DIY Home Window Tinting
This section outlines the steps required for successful DIY home window tinting, ensuring a smooth application and great results.
Preparing the Windows
Start by cleaning the glass thoroughly. Use a mixture of mild soap and water in a spray bottle to eliminate dust and grime. Wipe the surface with a soft cloth, ensuring no streaks remain. Measure the window dimensions to accurately cut the tint film. After cutting, allow the film to rest for a few minutes to minimize curling. Additionally, ensure the room temperature is comfortable, as heat can affect the film’s application. A clean, dry workspace aids in a more precise installation.
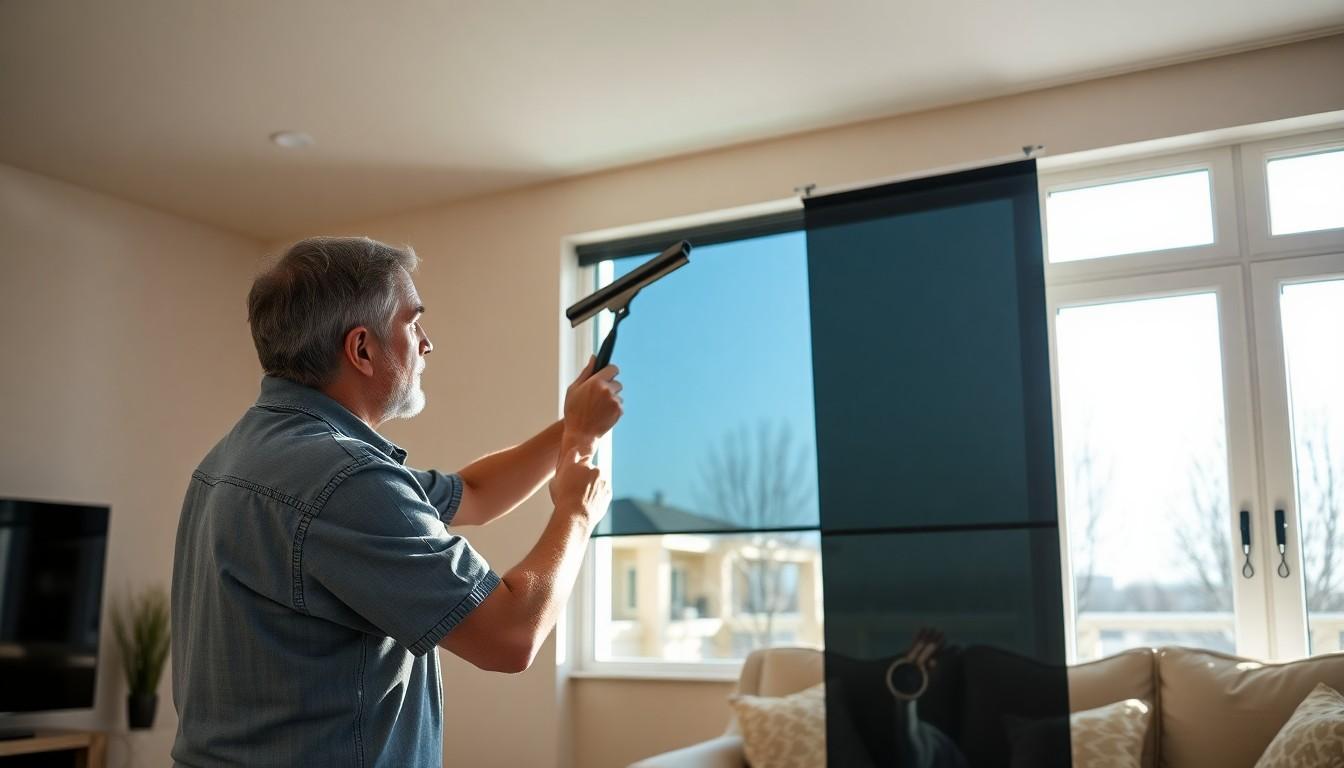
Applying the Tint
Peel the backing off the film carefully. Begin applying the tint from the top of the window and work downward. Use a squeegee to remove air bubbles and excess water. A sweeping motion helps in achieving a smooth finish without creases. Adjust the tint as necessary while it remains wet to achieve the desired positioning. Use a utility knife to trim any excess film along the window edges. Pat attention to detail during this step, as a clean edge enhances the overall appearance.
Final Touches
Inspect the applied film for imperfections. Any visible bubbles or wrinkles should be smoothed out or resealed. Spray a light mist of water on the surface if any adjustments are needed. Next, allow the tint to cure according to the manufacturer’s instructions, usually between 24 to 48 hours. After curing, clean the windows again to remove any residue. Enjoy the enhanced comfort and aesthetic appeal your new window tint brings to the home.
Common Mistakes to Avoid
Choosing the wrong type of window film can significantly impact results. Selecting a film that doesn’t match the climate or intended functionality may lead to poor performance. Many homeowners overlook the importance of measuring windows accurately. Inaccurate measurements can cause wasted film and mismatched edges, resulting in an unprofessional look.
Failing to clean the glass thoroughly is another common mistake. Dust and debris can create air bubbles and imperfections in the finished product. Using too much solution when applying the film can also be detrimental. Excess liquid may hinder film adhesion, causing it to peel or lift over time.
Not allowing the film to cure properly can lead to complications. Each manufacturer has specific curing times, and rushing this process can compromise the film’s effectiveness. Over-application of pressure while using squeegees might cause damage to the film. Maintaining gentle pressure ensures a smooth application without causing wrinkles.
Ignoring the manufacturer’s guidelines can result in subpar results. Each window film type comes with specific instructions for installation and care that should not be disregarded. Neglecting to test a small area first may lead to unexpected surprises. Performing a test patch can determine how the film reacts with the glass surface before proceeding.
Lastly, overlooking the local regulations regarding window tinting can create legal issues. Each area may have restrictions regarding tint darkness and reflectivity. Complying with these regulations prevents potential fines and ensures satisfaction with the finished project. Addressing these common mistakes enhances the overall success of DIY home window tinting efforts.
DIY home window tinting offers homeowners an effective way to enhance comfort and energy efficiency. By investing time in this project, they can enjoy reduced glare, improved aesthetics, and significant cost savings on energy bills. The right window film not only protects against harmful UV rays but also adds a layer of privacy, making living spaces more enjoyable.
With the proper tools and techniques, anyone can achieve professional-looking results. Careful preparation and adherence to guidelines ensure a smooth installation process. As homeowners embrace this DIY approach, they not only improve their homes but also contribute to a more sustainable lifestyle.